In today’s competitive real estate market, the quality of your property photos can significantly impact your success. High-quality images not only capture attention but also build trust and encourage potential buyers to take the next step. This blog will guide you through the essential strategies for using high-quality images to showcase properties online effectively.
1. Why High-Quality Images Matter
1.1 The Power of First Impressions
When potential buyers browse property listings, the images are often the first thing they notice. High-quality photos can create a strong first impression, making your listing more attractive compared to those with blurry or poorly lit images. A well-presented photo can make a property appear more appealing and inviting.
1.2 Enhancing Visual Appeal
High-resolution images help showcase the property’s best features, from spacious interiors to charming outdoor areas. They allow viewers to see details clearly, which can enhance their perception of the property’s value. Engaging visuals can also increase the time potential buyers spend on your listing, improving your chances of conversion.
2. Essential Equipment for Capturing High-Quality Images
2.1 Cameras: DSLR vs. Smartphone
While modern smartphones have impressive cameras, investing in a DSLR or mirrorless camera can provide superior image quality. These cameras offer advanced settings and lenses that can capture detailed and well-lit images. However, with the right techniques, smartphones can also produce high-quality photos.
2.2 Lenses and Accessories
Using the right lens is crucial for property photography. Wide-angle lenses are particularly effective for capturing large rooms and outdoor spaces, giving potential buyers a comprehensive view. Additionally, a tripod can help stabilise your camera, reducing blurriness and ensuring sharp images.
3. Preparing the Property for Photography
3.1 Clean and Declutter
Before taking photos, ensure that the property is clean and clutter-free. A tidy space looks more appealing and allows potential buyers to focus on the property’s features rather than being distracted by clutter.
3.2 Stage the Space
Consider staging the property to highlight its potential. Arrange furniture and decor in a way that demonstrates the space’s functionality and appeal. Staging can help buyers visualise how they might use the space, making it more relatable and desirable.
4. Lighting Techniques for Stunning Photos
4.1 Natural Light vs. Artificial Light
Natural light is often the best choice for property photography, as it creates a warm and inviting atmosphere. Aim to take photos during the day when there is plenty of natural light. However, when natural light isn’t available, use artificial lighting strategically to brighten the space without creating harsh shadows.
4.2 Using Lighting Equipment
Consider investing in lighting equipment such as softboxes or reflectors. These tools can help diffuse light, reducing harsh shadows and creating a more even illumination. Proper lighting enhances the property’s features and ensures that the images are bright and clear.
5. Composition Tips for Captivating Photos
5.1 Framing and Angles
Experiment with different angles to capture the property’s best features. For example, shooting from a corner can make a room appear larger, while taking photos at eye level provides a more natural perspective. Ensure that each shot is well-framed, with a focus on key elements of the property.
5.2 Highlighting Unique Features
If the property has unique features, such as a beautiful fireplace or a spacious garden, make sure to highlight these in your photos. Close-up shots of special details can help set the property apart from others and capture potential buyers’ interest.
6. Editing Photos for a Professional Finish
6.1 Basic Photo Editing
After capturing your images, use photo editing software to make adjustments. Basic editing can include cropping, adjusting brightness and contrast, and correcting colours. This ensures that your photos are visually appealing and accurately represent the property.
6.2 Advanced Techniques
For a more polished look, consider advanced editing techniques such as HDR (High Dynamic Range) imaging. HDR combines multiple exposures to create a well-balanced image with enhanced details in both bright and dark areas. This can be particularly useful for interiors with varying light levels.
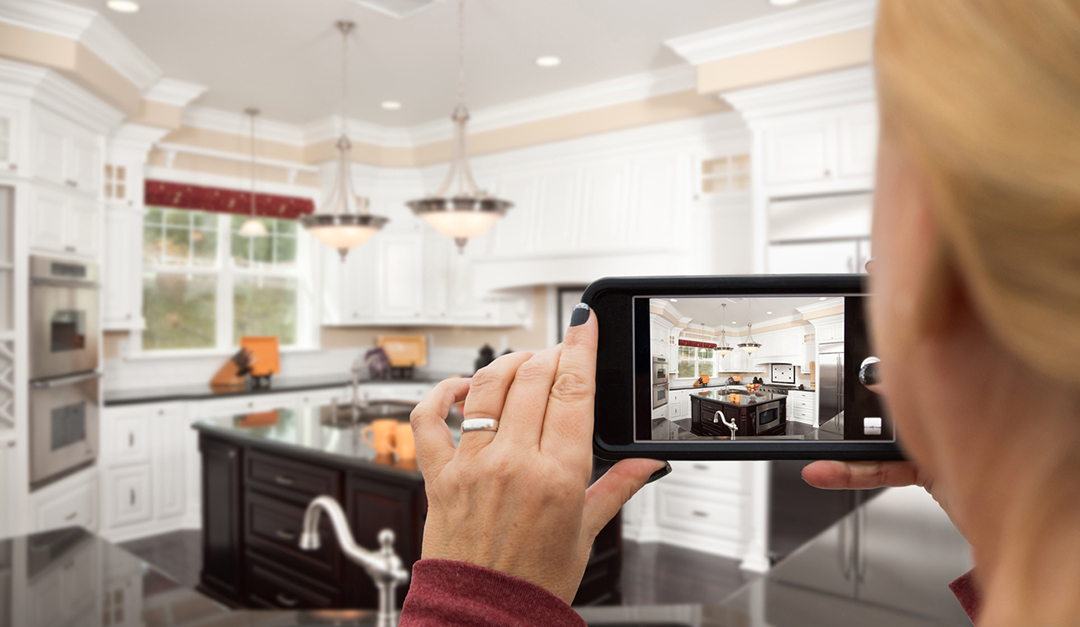
7. Using Images Effectively Online
7.1 Image Size and Loading Speed
Optimise your images for the web to ensure they load quickly. Large image files can slow down your website, which may deter potential buyers. Use image compression tools to reduce file size without sacrificing quality.
7.2 Organising and Labelling Images
Organise your images in a logical sequence, starting with the most attractive photos, such as the living room or exterior shots. Label images with descriptive filenames and alt text to improve SEO and make your property more discoverable online.
8. Conclusion
High-quality images are a powerful tool for showcasing properties online. By investing in the right equipment, preparing the property, and using effective lighting and composition techniques, you can create compelling visuals that attract and engage potential buyers. Remember, a picture is worth a thousand words, and in the real estate market, it could be worth thousands of pounds.
FAQs (Frequently Asked Questions)
1. How important are high-quality images for selling a property?
High-quality images are crucial for selling a property as they create a strong first impression, attract more viewers, and help potential buyers visualise the space better.
2. Can I use my smartphone for property photography?
Yes, smartphones can produce high-quality images if used correctly. However, for the best results, consider using a DSLR or mirrorless camera with a wide-angle lens.
3. What’s the best time of day to take property photos?
Natural light is ideal, so aim to take photos during the day when there is plenty of sunlight. Early morning or late afternoon often provides the best lighting.
4. How can I improve my property photos without professional equipment?
Use natural light, declutter and stage the space, and experiment with different angles. Basic photo editing can also enhance the quality of your images.
5. What are some tips for editing property photos?
Focus on basic adjustments like cropping, brightness, and contrast. Advanced techniques such as HDR imaging can also improve details and overall quality.